What's the weather like in Doug's neighborhood?

Tuesday, December 23, 2008

So, what's new?

Nada much. Just burning up the time until Christmas. Spare time has predominantly been used for shopping and family activities. Nothing wrong with that though. Life is too short not to enjoy the ones around you.

This weekend took that spirit. So with temperatures in the low 60's and a lake in the park across the street it was time for some water sliding and general mucking around.

Took the better part of a day to remove all the errant grass cuttings from eyes, ears, and wherever else they got to. It was good to get out and play in the water. I haven't had a good water slide session in years. Austin started to catch on, but for the most part he was either doing a power slide on his knees or a face plant. Faith was happy to tromp around and dunk her lower half ever once in a while. Erin and Zoey sat on the sidelines for most of the fun. Poppy decided that water wasn't too bad and her natural instinct of a water dog took over. She was swimming, running, and jumping around in wet doggie bliss. Add a few beers and a movie to wrap up Saturday.

Sunday we were treated with an unexpected slumber. Erin and I both stirred, heard the kids playing, but decided to snooze. We were a little shocked to find it 11am by the time we got up. Pretty rare to get that kind of rest around these parts. After coffee it was time to tackle the leaky faucet in the kids tub. Hmmm, where is the darn water shut-off valve for this house??

Under the frog of course! After a bit of poking around I found the water shutoff. It is down a terracotta tube behind our poky hedge. With all the bugs and such out here I don't typically go sticking my hand into holes in the ground. I did here and was rewarded with a slimy tree frog. So I called for reinforcements. No, just called the kids. Got to spend a few minutes passing the frog around. Then back to work. I got the faucet patched up best possible, it has some internal pitting so it still leaks in some handle positions. I am not really sure where the rest of the day went, went it did go.

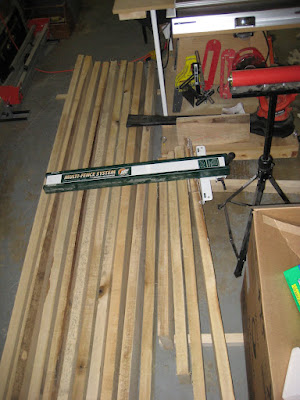
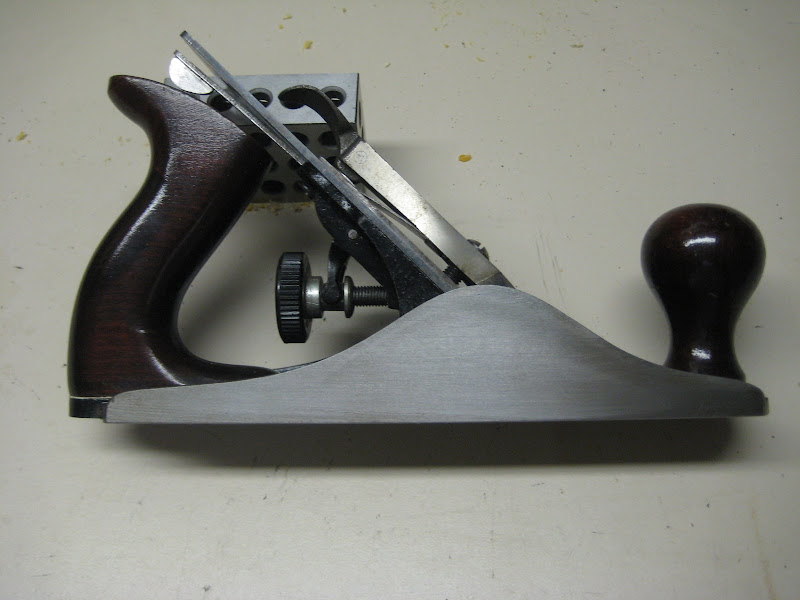
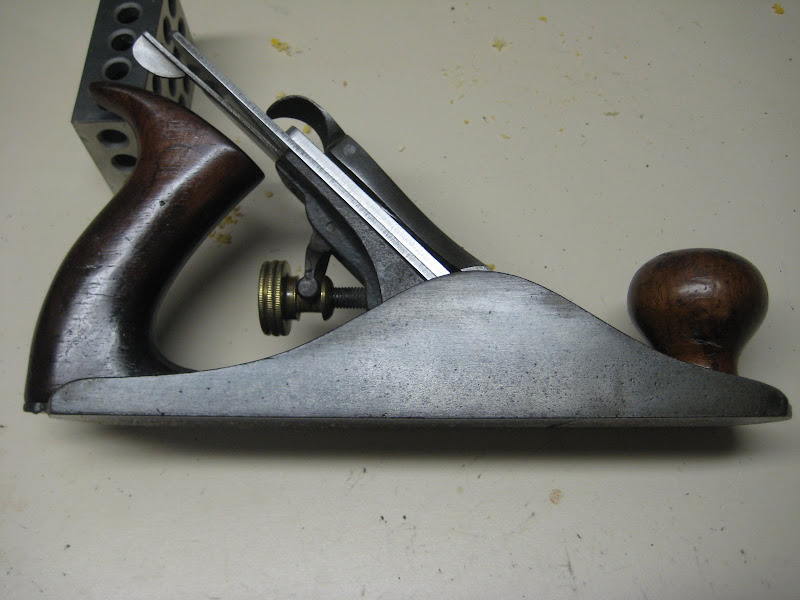
Nothing major in the garage. I had a package come in yesterday. Erin gave me the stink eye on it, but I snuck off to the garage to inspect my new-old Stanley No608 jointer plane. This thing is a beast. It is the biggest cast iron plane Stanley ever produced. Close to 10lb of heft and 24in in length. Side by side it drawfs my No7.

Not entirely sure on the age, but I am guessing it is a type14 plane manufactured 1929-1930. I have to do a bit more reading to confirm though. It was delivered "sharp and ready to put to work". We'll see soon enough. Hopefully I can get some woodworking done over the Holiday break.

take care...

Merry Christmas everyone.

Tuesday, December 16, 2008

Family Portrait


Well, what were you really expecting to see? :)
Last weekend I managed to sneak in enough time in the garage to complete the refinishing of my great grandfather's No6 fore plane. I will most likely give it it's own photo shoot after I lap the sole flat. At any rate, with it looking so pretty and after a couple of additions to my arsenal I figured it was a good time to take a new group shot.

Back Row (L-R):
1 - Sandusky coffin smooth plane, pre-1900's
2 - Stanley No78 rabbit plane, likely from the 1940-1960's
3 - Stanley No40 scrub plane, 1920-1940
4 - Stanley No7 jointer plane, type11, 1910-1918
5 - Stanley No6 fore plane, type6, 1888-1892
6 - Stanley No5 jack plane, type18, 1946-1947
7 - Stanley No4 smooth plane, type11, 1910-1918
8 - Stanley No3 smooth plane, type17, 1942-1945
9 - LieNielsen medium shoulder plane, 2007-2008

Front Row (L-R):
1 - Stanley No80M cabinet scraper, Sweet Heart era 1919-1932
2 - Lie-Nielsen low angle block plane, 2008

Not pictured:
1 - Stanley No29 transitional fore plane, 1867-1909
2 - Ohio Tool wooden jack plane, unknown age
3 - Stanley No4 smooth plane, type17, 1942-1945
4 - Stanley No5 jack plane, type12-13, 1919-1928
5 - Stanley No608 jointer plane, type14, 1929-1930

Wow, they weren't kidding when they said that getting into hand tools and restoration is a slippery slope. I don't think I ever stopped and took inventory before just now. Simply shocking that over a dozen of these things have followed me home. The only saving grace is that most didn't start out looking pretty. The ugly duckling factor keeps the bidding low over at e-bay so most of these planes were under $20. After the elbow grease each is capable of pulling $50-100 at auction. Not a bad return on investment. Of course I have no plans of setting any of these loose any time soon. Gotta get my money's worth out of them or Erin is gonna have my head :)

Wednesday, December 10, 2008

Go Elf Yourself

Erin and I put this together last night with the help of Office Max. We were cracking up at the way it turned out. Hope you like it.

Send your own ElfYourself eCards


If you get bored I recommend trying it yourself.

Monday, December 8, 2008

Weekend review

Not much woodworking this weekend. My sister Shannon was in town. To top that we had the company Christmas party and some holiday decorating to tend to.

I did sneek into the garage for an hour or two in the afternoon while Erin and Austin were watching a play of the Christmas Carol in town. It was interesting trying to keep an eye on Faith and get some lumber milled. She was pretty cute other than the yelling. She would post up on the lawn mower with ear plugs and glasses (yes, it is currently in the garage for repair). From her mower perch she would yell random things at me.

I am trying to get up some sort of a simple mantle for the living room so that we have a spot to hang the stockings. So I eyed out some simple mantles on google images. I figured that I could use some of the offcut pieces of poplar since the mantle will be limited to 44in. So I picked out a couple of the boards, checked grain direction, and marked them up. Bandsaw to rip to jointer width. Jointed 1 face and 1 edge. Back to the bandsaw to rip the width. Planed to thickness of about 1.5in. Then I glued the 2 boards together.

I ended up with a 50in x 10.5in glue-up that I can trim to finish size. In typical Erin form she informs me that she doesn't want to have something that looks like a shelf. It needs to be bigger, more substantial. Yet again I find myself building to suit the Mrs. It is hard to plan ahead since our personal preferences are so different.

Oh well, off to put up the Christmas tree. Faith was very helpful in handing me branches for our fake tree. I am not sure how many more years it has in it. For us with young kids and puppy dogs running around it is just a safer bet to use the fake again this season. We got the tree up just about the time that Erin and Austin got home.

Just a good'Ol family weekend here. Hope everyone else is doing well.

Thursday, December 4, 2008

Boy Scouts at work


type="application/x-shockwave-flash"
width="450"
height="382"
bgcolor="#F4F4F4"
src="http://www.thefunnystuff.net/FunniestStuffPlayer.swf"
FlashVars="videoFile=http%3A%2F%2Fvideos.funnieststuff.net%2Fcontent%2F2008%2F11%2F24%2F1%2Fboyscouts.flv&videoTitle=These%20boy%20scouts%20are%20doing%20their%20part.&autoPlay=false&fullScreenScriptURL=http://www.thefunnystuff.net/scripts/funniestStuffPlayerFullScreen.js">

Out in the shop, week in review

Nothing too exciting around the shop this week. I worked Friday, so no long Holiday weekend for me. We weren't overly festive this year anyhow. I actually marinated and grilled some steaks for our Thanksgiving dinner. Saturday was house cleaning. I did get a chance to finish up sharpening and tuning the Sandusky woodie.


Finally Sunday afternoon I got some shop time. Ended up spending half that time sitting there scratching my head. Then the other half doubting the decisions made in the first half. Check out this thread for details of that mess.
http://lumberjocks.com/topics/5447
Here is a shot of the pile of rough poplar in question

Still scratching my head a bit, but think the route forward is in motion. I am most concerned with conservation of thickness, so ripping to jointer width on the bandsaw is going to be the best path forward.

Last night I finally got the Woodcraft low speed grinder out of the box. Initial impressions are mixed. The speed and noise are good. The narrow format, thin guards, and cheap tool rests leave some to be desired.


The stock tool rests are finished by paint or powder coat over the rough cast iron. Cast iron is good. The weight will help damp out some of the vibration. The rough finish is not so good. Another noteworthy trait is that these tool rests are tiny. They may be fine for chisels, but I wouldn't trust my ability to keep a wide iron flat instead of teetering off the edge.


So I have devised a plan to pilfer the tool rests off my high speed grinder. They have a lot more surface to register on.


I just need to decide the best route to attach the parts. I am leaning towards JB Weld or Epoxy. I started to go the drill and tap path, but thought better. The cast parts stand a fair chance or cracking during the process. It would also lead to holes in both rests that could collect abrasives or catch on tools I am working. Since this isn't a high stress application I think it is fine to go the epoxy route. Eventually I would like to make or purchase independent tool rests, but with the holidays coming that will have to wait a while.

I think the high speed grinder is a good candidate for buffing duty. It has a much wider stance at the arbor mounts. This conversion would also be good since I am borrowing the tool rests for the new grinder.


That's all I got for this edition. Look for progress on that rough lumber in the next go round, a grinder update, and maybe some more discussion of the sharpening station. Thanks for reading.

Saturday, November 29, 2008

Little woodie

Well, this one has been on the workbench for about a month now. Before that it was on the shelf for a while. I don't really know the last time this plane actually saw any use.

Here is how I got it. Honestly it doesn't look too bad.

But initial looks are a bit deceiving. Iron and cap were a bit rusted. The plane sole had a couple cracks and the wedge was anything but flat.

The wood got sanded down. I used titebond3 to seal and bond the cracks. Then it got a couple coats of 2lb cut shellac. Finished it off with a rub down and paste wax.

The blade has given me a bit of trouble. Not only was it rusted, but it had been beat pretty good. Fortunately no pitting. Once the rust was resolved I went at flattening the back. This turned into a 2 week process. A previous owner had dubbed over one corner badly (probably the same guy who hammered the tar out of the blade). With a combination of coarse paper and grinding the bevel back this is just about remedied. But it was a lot of work. In retrospect it would have been better to take it to the belt sander and forget about preserving the Sandusky logo. Oh well, live and learn.

Well, initial results are in.


a bit slack jawed...


It does cut a nice shaving, but the mouth opening leaves something to be desired if it is ever going to be a smoother. Either I need to re-sole it or camber the blade and make it a scrub. Jury still out on that.

Wednesday, November 26, 2008

Christmas wish list

Hey, never hurts to be optomistic. Someone might be looking for that perfect gift for their woodworking friends.

From Sawmill Creek
Best Christmas ideas under $20

From Lee Valley
Holiday Gift Ideas

My personal wish list:
- Lee Valley Dovetail Saw $69
- Lie-Nielsen 12in Tennon Saw $165
- Norton 3x Grinding wheel 8"x1" 80grit $47
- Norton Multi-Point Diamond wheel dresser $39
- Fine saw set 12-26pt $16
- Hock 2in Straight Edge Plane Iron $43
- Grizzly Double square $18
- Makita backing pad for sander $14
- The Handplane Book $17
- Workbenches Book $20
- Timberwolf 1/2x93-1/2, 3tpi bandsaw blade $29
- Woodcraft Gift card and size will work :)
- ZEM Hearing protection $20

Okay, long list and I fear too much on the high end side. Oh well gives some ideas anyways.

the RB memorial sharpening station

I have been lugging around this heavy duty workbench for a few years now. Acquired from part of my Granddad's estate. Since moving in I hadn't needed to set it up, so in the corner it sat. Well this week I reclaimed it from the cobwebs. I stumbled across a large granite surface plate on the cheap. Upon bringing it home I needed to find a home capable of supporting the 150lb mass. I am still not positive that the top won't sag, so I will keep an eye on that.

Back in commission:


no7 for reference


Good spot to nest some of the spare parts, stones, and jigs


More space. Hopefully this predefined storage space will prevent me from piling on the work surface. Here's hoping.


I have a plan for how best to use this bench. Obviously I am not going to be moving that hunk of rock around on any regular basis. I lucked out in getting it from my truck to there without even breaking a sweat. My planer cart allowed me to just slide it out of the truck onto it and then slide it again right onto the bench. There it will stay.

hmm, where was I?
Oh, the plan. I am picturing a series of shelves that can be placed over the granite slab. These shelves would be #1-for the whetstones, #2-for the slow speed grinder, #3-for the wet stone grinder. When I need to use the stones, simply put it's shelf over the granite. Likewise if I want to use the grinder, just put it's shelf up there. For lapping and stone flattening I will just stick sandpaper to the surface plate with 3M super77.

Hopefully this will get me to stop using my TS and Jointer for lapping plane soles

:-)

Monday, November 24, 2008

The No5 restoration

I have been recieving some questions on plane restorations, so I figure I will put together a start to finish on one of the planes I just did.

In the beginning we have a sub $10 e-bay win. Never going to win any beauty contests and not of a very well regarded vintage. So it is a perfect candidate for a facelift.


Initially I just cleaned it up and put it to work. This gave me a chance to test drive prior to investing much time or money. I would recommend testing a plane prior to a full restore if it is in a state that allows it.


Okay, now tear it down and strip it to bare metal. I used a combination of Aircraft paint removers. After a couple of application and rinse cycles you get to something that will likely look like this.


Next up is rust removal. There are several ways of going about this. Brute force method is to just take a wire wheel to it. Electrolysis is better option, but it is messy and requires hot wires in an open tub of water. Electrolysis is probably the most economical method if you plan on doing a lot of planes. Then there are the chemical chealators. Naval Jelly is just nasty stuff, but it will convert rust.

My preferred method is Evapo-Rust. Non-toxic, no offensive oddor, no worries of a chemical burn. It removes rust and creates a protective barrier against flash rusting.

After a couple of soak and rinse cycles you end up with a part that looks like this.

Some rust staining will remain, but the bulk of it will scrub off with a soft wire brush. So scrub it. After you are satisfied with the surface do a dip in the evapo-rust and let the part air dry. This will leave a protective film that lasts up to 2 weeks. I let the parts air dry overnight before proceeding.

Up next masking and painting. I stuff paper towel wads into the screw holes and mask the sides. I oil the frog pads so enamel won't bond. Pretty simple. For paint I was recommended Duplicolor Engine Enamel. After using it a couple of times I agree that it is the way to go for a finish that mimics the original japanning, but is much easier to apply and readily available at places like Autozone. You will need to apply 4-6 coats in short sessions. Give about 10 minutes between coats. Here is what you will be looking like.


Allow 20-30 minutes after the last coat, but not enough time for the enamel to fully cure. Then remove all masking and plugs from the screw holes. Take care not to touch the wet enamel as it will leave marks in the finish. Allow the finish to cure overnight. You should now have something like this.


Now it is time to remove the enamel from the areas that it doesn't belong. To remove it from the front, back, and top of the cheeks I just use some 120g sand paper. This is mainly just to restore the plane to an original aesthetic. You could leave the enamel on those areas if it doesn't bother you.


Next prep the frog to sole interface. A light sanding to remove any enamel overspray may be all that is required. On the other hand some light machining may be in order. Several of my planes have had rocking at the interface. Use a file or machinist scraper to remove metal from the sole or the frog high points until the rocking is removed. Oil everything and reassemble.

I installed a Hock iron and chip breaker. I am really a fan of these. The added mass does make a significant difference in cut quality. I also like the clean interface that the machined chip breaker provides compared to the stock sheet metal version. I still have the stock iron and breaker, maybe I will camber them and use that set for roughing.

I used aftermarket replacement tote and knob on this plane. Since the originals were Beech painted black they weren't worth restoring. I think I will put up a seperate blog to discuss refinishing of handles and cleaning/polishing of brass hardware.

The end result


Sunday, November 23, 2008

Fall colors


This is the stereotypical fall colors. Beautiful, majestic, and a tell tale sign of the changing seasons. This is the top image when searching "fall colors" on google images.

Yep, I got your fall colors right here. Crap, nobody told me when I moved here that I would have to rake 2 tons of leaves annually. Actually the fall colors are on the curb waiting to be hauled away. I spent my entire afternoon raking and transporting leaves to the curb. Amazingly I was able to do both front and back yards. Okay, maybe not amazing to everyone but I was pretty pleased to take on the entire yard and come out on top. Of course the day ends with me grumpy, tired, sore, and a bit buzzed (raking is a good excuse to drink beer all afternoon). Here is one of my piles...


Temperatures have been droping into the 30-40's at night. During the day we are posting up at around 50-55. Not bad, but definitely time to bust out my winter gear to tackle any outdoor activities. Today I donned my Mountain Gear thermal fleece. That coat is amazing. At less than 1/8" thick it has me sweating at anything over 60 degrees and it seems to be good down to about 40 degrees with only a t-shirt under it.

In the garage...
Some goodies this week. Packages have arrived. Erin hasn't said much. She did inquire about last nights package, so I showed her my ass. Err, my horse but that is. Yep, that's right got me some good'ol horse but leather to strop my blades. That stuff is tough, arguably the toughest leather available.

I have my first catch and release in the books this weekend as well. I cleaned up my extra no6 and promptly sold it to another woodworker. I would say at a profit, but that would be foolhearty since I spent about 4 hours tooling on it and some money on supplies. I think I broke even in a sense that selling it paid for the supplies to clean it and 2 other planes. I also take a rusty hunk and return it to service. I can't save the world, but putting good made in the USA tools back into service just makes me feel good in the patriotic sense.

Also in the garage, big'ol rocks. Yep, I got big stones. Wanna see?

Them are some good'ol fashioned Arkansas stones. I have only sharpened one blade with them, but I gotta say WOW. They work great and don't erode like the synthetic stones. These are 10x3x1 in size and are what I would consider an heirloom since even if I used them daily I still wouldn't be able to wear through them in my lifetime. In contrast my Norton waterstones loose about .010-.020" per sharpening session. This is another instance that I am reminded that we are duped as consumers in this century. We are sold that the latest and greatest sharpening stones are where it is at. Of course nobody bothers to mention that these hot new stones will only last a few years. Dang, why do I keep learning all this the hard way.

Thanks to Microsoft. Wait, did I just say that. Okay, evil empire aside MS has a cashback promo that is currently returning about 25% on purchases with buy-it-now on e-bay and paypal. MS Live Search Cashback
It does take a while to get cash back, but rebate programs offering 20-30% back just don't come along every day. I recommend you check it out if you have anything on your e-bay shopping list.

Sorry, no woodworking this weekend. Just house cleaning and yard work. Gotta do the dirty stuff sometimes. Thanks for reading and take care.

Thursday, November 20, 2008

Working on planes

Been fussing over some hand planes in the garage. Okay, so what's new there?

Evapo-rust
Yep, that's right Evapo-rust
This stuff is cool. Dissolves/converts rust in a non-toxic and non-corrosive chemical reaction. It is rare to come in contact with a cleaning solvent that actually works yet is not something that you have to worry about getting on your skin. Here is an example...

before:


after:

About 5 minutes with a wire brush and the dark oxide comes right off leaving a surface about as good as new. Other than a little babysitting this process is a very minimal effort for the returns. Cost is about $20/gal and it is reusable.

Here is another example of what can be done.

before:


after:


There is some sort of an etching reaction as part of the process. Note the gray hue to the raw metal. This etch by itself will prevent rusting up to 2 weeks. Of course if you want shiny metal you do have to buff through it.

The No.6 pictured above was a fun project. I will most likely release it back into the wild though. I was looking for this size plane and picked up this rough one on ebay. Then out of the blue my dad shows up with another one. So here I am with 2 of the same plane except one does have some family relevance. I think I can flip this one now that it is restored for enough to cover the evapo-rust, stripper, and paint. Time is out the window though since I don't get payed to tool around in the garage.

SawStop, just in case you hadn't heard

Yep, the old saying fingers and toes...


http://www.sawstop.com

If woodworking does continue as a life-long hobby of mine I am going to have to invest in one of these machines. Introductory cost is about the same as a simple ER trip for stitches. But keeping those fingers is pretty much priceless.

Friday, November 7, 2008

Friday fun

Gotta love youtube for totally useless humor. Some people have way too much free time...


Well, yesterday was Faith's 3rd birthday. Time flies when you are having fun. My parents are in town and we had one of our friends over with her children. I will try to get some video and pictures up. She happily cruised around for the evening in a princes tiara and a pink tutu. So much for not raising a princess...

I have been scrambling to get the table together so that we could at the minimum all sit at the same table. Well, with about 2 hours to spare I got it up into the kitchen. Of course this isn't the final build. I threw in the towel on Wednesday and picked up a sheet of hardwood ply. Too much going on to laminate up the actual table top. I did have just enough time to stain and seal the legs, stain and polyurethane the top, and pocket hole screw the top on. This turned out to be a good exercise. It gave us a chance to test the table size and for me to get a scale model to show Erin the size. As it turns out, looks like the table will need to be somewhere between 6' and 7' to fit the room better (I built the plywood top at 8ftx40in). So, there you have it made a quick table and bought myself a little time for the other projects.

New tools!
Yep, my dad showed up with a truck load of stuff for me. Mostly from my grandfather's estate. Among all of the stuff that I don't need were some jewels:
- 2 10in hardwood screw clamps
- 2 12in hardwood screw clamps
- 4 Jorgenson quick clamps
- a dozen multi drill bits
- a cutting board (should come in handy for quickly cutting snadpaper to size)
- dremel tool, new in box
- a Stanley Bailey No.6 jack plane

I am pretty jazzed on this stuff. The plane was my actually from my grandad's step father. A quick type study of it reveals it to likely be a type 5 produced sometime between 1888 and 1892. This makes it the oldest of my hand planes. It is pretty rusted, the handles are toast, and the blade is rusted solid to the chip breaker. It will be a challenge to restore, but I was able to get it apart so at least I will be able to bring it back to life. I will add some pictures later.

Other treasures from the pile include a bunch of my old toys. The cool part is that Austin is hitting the age where he will be totaly stoked to play with them. RC cars, construx, and erector set type toys. Dad also brough my Sega game gear and nintendo gameboy. A bit of video game flash back. Hopefully sometime in the next year or so I can get my original nintendo and games shipped out here. Again, I can teach Austin to play these and I think he will be pretty excited.

So fun stuff. The garage is a mess again. Catch you later. I am off for a 4 day weekend. This government job is a hoot sometimes with respect to holidays. Seems like half of them are within 1-2 days of a weekend so it is just too easy not to stretch the weekend.

Wednesday, November 5, 2008

In the garage

Okay, not going to go political. Last post is as all I am going to say about recent events. Soooo, moving on. I have been cranking in the garage, trying to get some semblance of a table together. My parents are due in, so we need to be able to seat 6 at the table for dinner. That 30in round table just isn't going to cut it.

Well, to the best of my efforts I don't think I am gonna get it done. Here is where it sits.


Things went together pretty fast.
Say hello to my little friend.

I have avoided biscuit jointers for years. Hard to justify dropping $250 on a one trick pony. Well, Lowe's has had a clearance tag on their display model for a couple of weeks. This one was originally about $100, marked down to $79, then to $68. I took it up to the manager and he dropped it down to $60. Such a deal, how could I say no. I adopted it on the spot. After my last glue up and how the boards shifted, I wanted a little help in keeping things aligned and the biscuit jointer is perfect for that application. See this article if you want to know a bit more about biscuit jointers (what they are and why use them)

So I now had a biscuit joiner. I got to thinking, hey this would be a quick way to attach the aprons to the legs of my table. So I made a test piece. I was surprised at how much beating it took to break my test piece, so I decided it was a strong enough approach. Here is a shot of the joinery.

I wasn't 100% confident, so I added glue blocks to give some additional strength.


Glue up was a bit stressful. To reduce chance of error I glued the short ends in a seperate step, let that cure for a few hours. Then I took those subassemblies and connected them with the long aprons. I used titebondIII, so I had about 10-15min to work with it. I still felt like I was rushing to get it all together. It came together pretty well.


Next day I trimmed the legs to length. Yep, pulled a bonehead. I had left the legs long to be able to trim to length. Well, I got in a rush to taper and cut the joinery and in my haste neglected to trim the legs. So I lopped 3in off the bottom after assembly. No biggie. Busted out my ryoba to hack off the ends, then used a rasp to square the feet back up. I flipped it back upright and planed the top of the legs/aprons into a flat surface for the table top. Look at those nice fluffy shavings on the floor. I am really loving my hand planes these days. I now have most converted over to aftermarket blades. The aftermarket blades are thicker so they don't vibrate as much during the cut. Aren't they cute all tucked away in their drawer...

Well, America wants change

as the saying goes, be careful what you wish for...

Thursday, October 30, 2008

How have times changed

Came across this little gem on my lunch break today.


Can't help but wonder if things haven't changed for the worse with all of the "outsourcing" of labor. Watching the contractors and craftsmen in that video I was struck by the notion that even today this type of hands on skill is rapidly leaving our society. Without a renaissance of craftsmanship these skills will be lost to future generations. Some may say good riddance. I think it is a bit sad.

Tuesday, October 28, 2008

Plane restoration

Over the last several months I have taken time that could have been spent woodworking to adopt and care for some old planes. Most were inexpensive, rusty, and unkept. With a little time and attention these antiques are ready to serve another generation of user. I think that is pretty cool. In this era of disposable tools these relics of a time gone by are heartwarming. These tools have character. All are 50-100 years old and a testament to the "they don't make em like they used to" sentiment.

Here is a photo slideshow of a few of them:

Monday, October 27, 2008

Where in the world is Doug??

Work, home, or on a beer run. Those would be the most likely candidates.

So weekend followup. What happened round these parts? Not much. I took advantage of some garage time to straighten up some more, sharpen and tune some planes, and of course get my jointer back together to tackle the table project. The new helical insert cutterhead is sweet. It is quiet, sharp, and produces a surface that could go straight to finishing. Well worth all the hoops I went through to get it set up.


The new additions to the hand plane collection over the last month or so...
the no42 Lie Neilsen shoulder plane:
aka the deal that was too good to pass. e-bay is the devil. I don't think the original owner even used this plane other than test cuts, it still had the factory bevel on it.


the Stanley Bailey no.3:
WWII vintage, heavy casting, I added a hock blade. Very nice little smoother or to be used for work that is just a bit too much for the block plane.


the Stanley Bailey no.4:
a bit bigger than the no.3. Another e-bay temptress. Got it for about half of what the aftermarket blade and chipbreaker sell for. Older plane, probably circa 1920 if I had to take a wag at it.


Okay, that is a lot of new tools. Not likely to see another haul like that for quite a while. Enough about tools, what about that dining table??

There she is. Well, that is the base of the table (aprons and legs). I laminated and rough squared the legs this weekend. Tonight I milled the aprons. The legs are about 3-7/8" square right now and the aprons are 2" thick. I am going to let them sit for a day or two to adjust to the cuts. Meanwhile I need to decide on the proportions and construction details. In my spare time I need to do a lumber run to get the wood for the table top. I am favoring 40x84 inches for the top. That is a bit of work. I would have 4 sections to work with my planer. I'll keep you all posted, but it is going to be real tight to try and have this one done by the end of the month. Slipping from slim chance to no chance rapidly.

Here are a few screen caps of what the finished table should look like with respect to proportions.


In other news, I am a man without a country. Well at the least missing a defining accessory. Over the weekend I sold off my bikes and my park workstand. So don't come here expecting any ride updates for a while. I will get a new bike, but with current state of the nation I figured that getting out of debt was more important than riding for now. It is a hard decision to put a loved hobby on the back-burner. The only consolation is that my bikes provided enough cash to pay off our time share. So one less monthly bill. One step in the right direction.

Family is doing well. We rearranged the office to give Austin a more conducive learning environment For those who don't know, we pulled Austin from 1st grade and Erin is home schooling him. He ended up with a very poorly equipped teacher this year. So bad that we made the decision that if anyone was going to mess up our kid it was going to be us, not some teacher at wits end. Thus far the transition has been very good. Austin is a much happier kid and Erin seems to be getting by okay too.

I could probably keep babbling, but I am gonna call it and get to bed. Hope everyone is doing well. If you are out riding put in an extra mile for me.